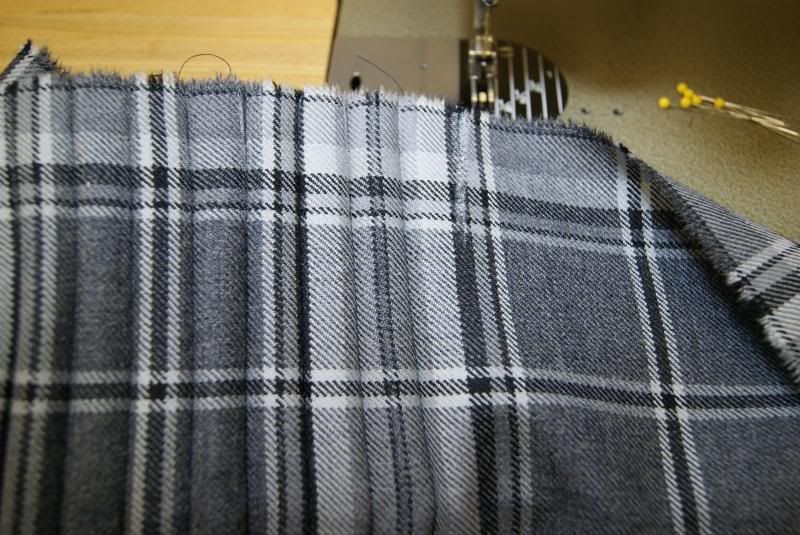
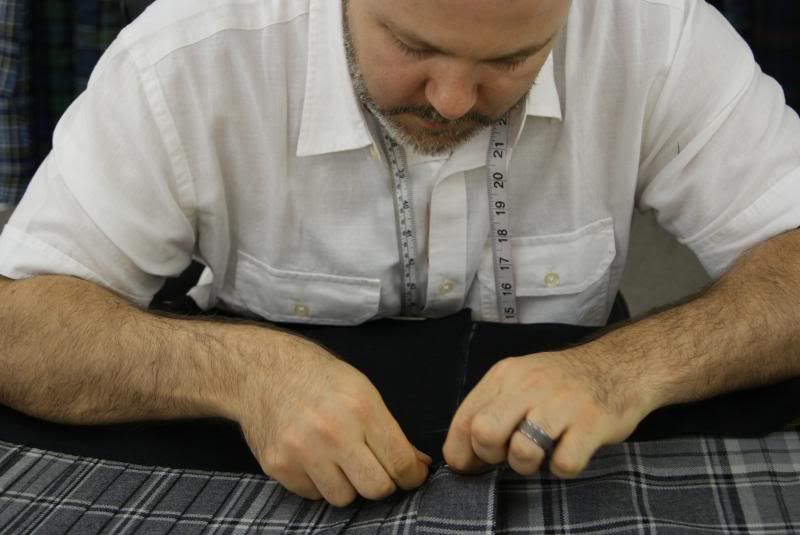
The largest block of time is in the sewing of the pleats. Each pleat is meticulously measured using a tiny ruler and then pinned. When the pin comes through the back side, the adjacent pleat must be measured as well. This is how we sew the pleats "inside out" so that you don't see any of the stitching from the outside of the kilt.
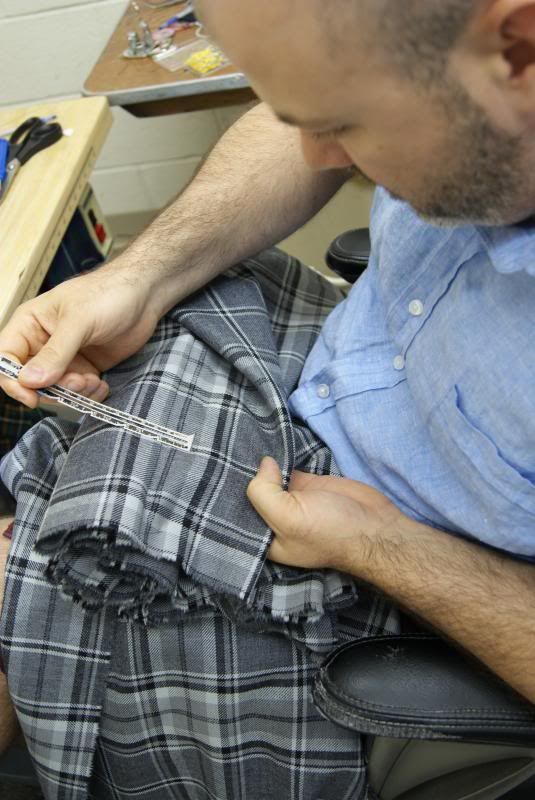
Each pleat is pinned 6 to 10 times down the length of the fell (the sewn down area in the upper portion of the kilt). Measuring and pinning and sewing each pleat takes roughly 8 - 10 minutes per pleat. To give you an idea how long that will take, this kilt has 28 pleats, which means we'll spend about 4 hours (and up to 5 hours if we have to re-do any pleats) sewing the pleats alone.
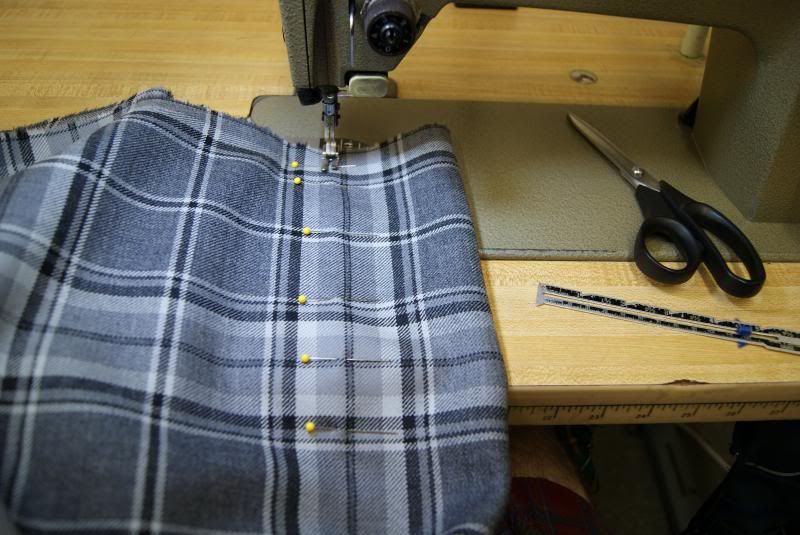
Then each pleat is sewn, slowly and in keeping with the curve of the person's body (waist to hip ratio), with reinforcement at the bottom of the fell.
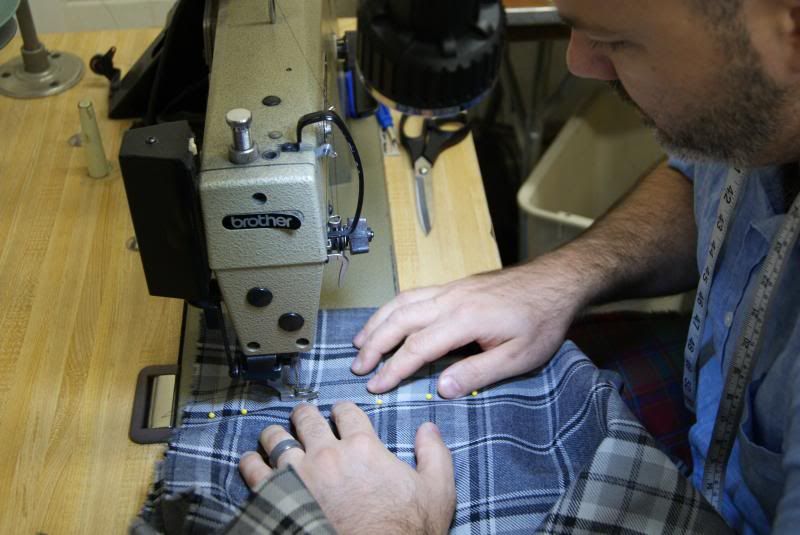
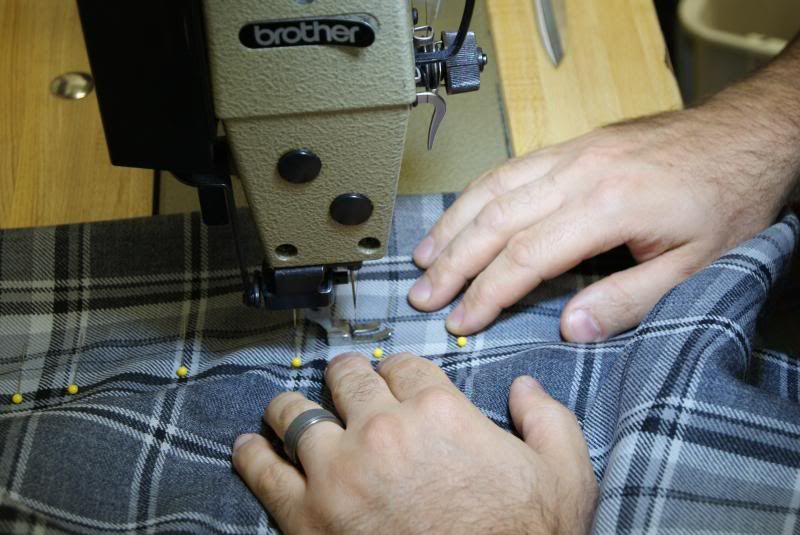
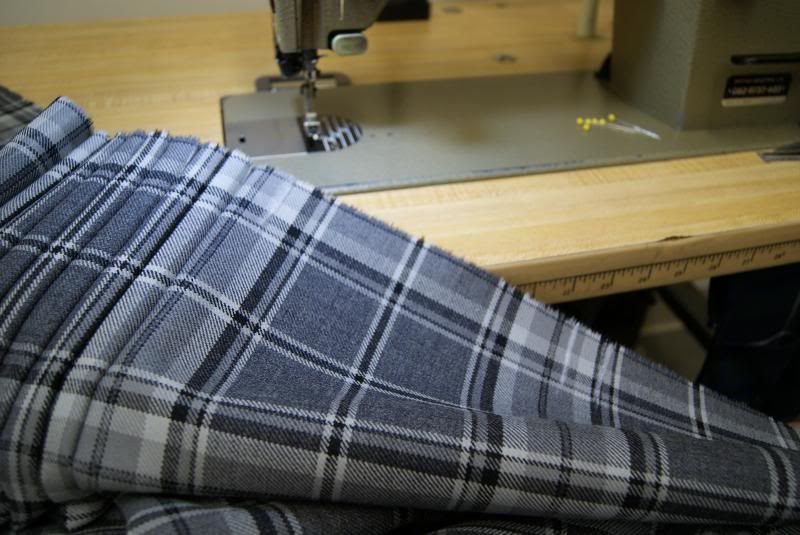
After the pleat is sewn, the pins are removed and the pleat is checked for accuracy and consistency. The horizontal lines of the tartan must be perfectly lined up with no "stair effects" (where one line is higher than the same line on the adjacent pleat). The pinning helps to minimize this, but occasionally we get the "stair effect" for a particular pleat if the fabric twisted while pinning or sewing. At USA Kilts, our tolerance is 1 thread off. If the "stair effect" is 2 threads or more, the pleat must be taken out and re-measured / re-pinned / and re-sewn.
After the pleats are all sewn in and the front and rear aprons are attached, the pleats are pressed flat down the length of the fell and scalloped out. This reduces the bulk in the waistband and makes the kilt more comfortable. It also compromises the structural integrity of the kilt, so the pleats must be steeked across the bottom of the fell to keep them from dipping down below the bottom of the kilt where they aren't supported in the waistband.
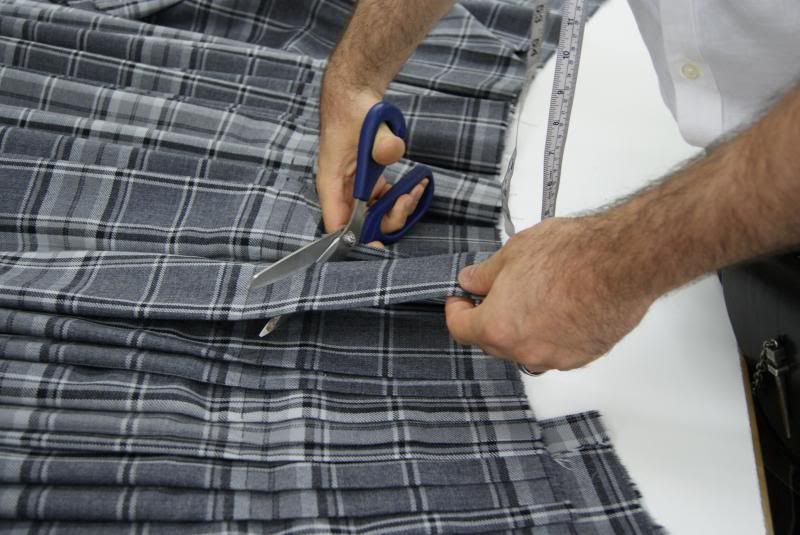
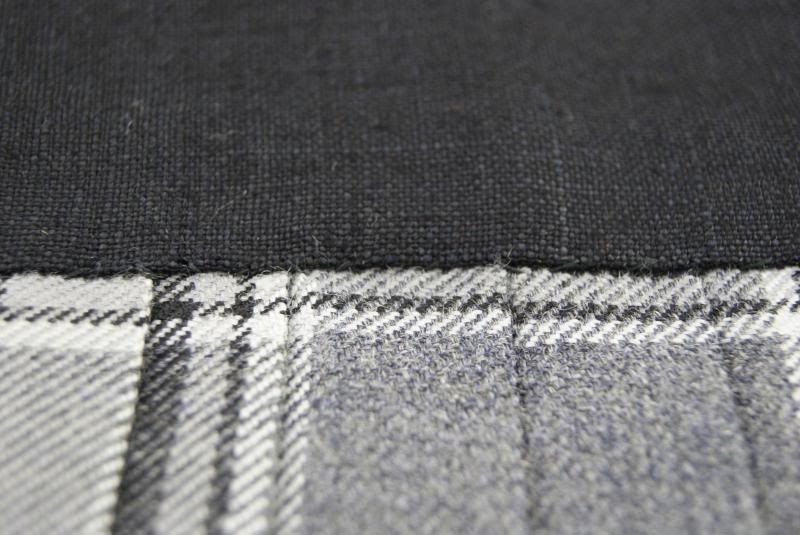
The pleats are steeked (we steek them with a machine to themselves and then we also steek them by hand to each other) to reinforce the structural integrity of the garment. From this point on, pretty much all the sewing is done by hand. It is much more time consuming than using a machine, but must be done by hand to keep the stitches from showing through to the outside of the garment.

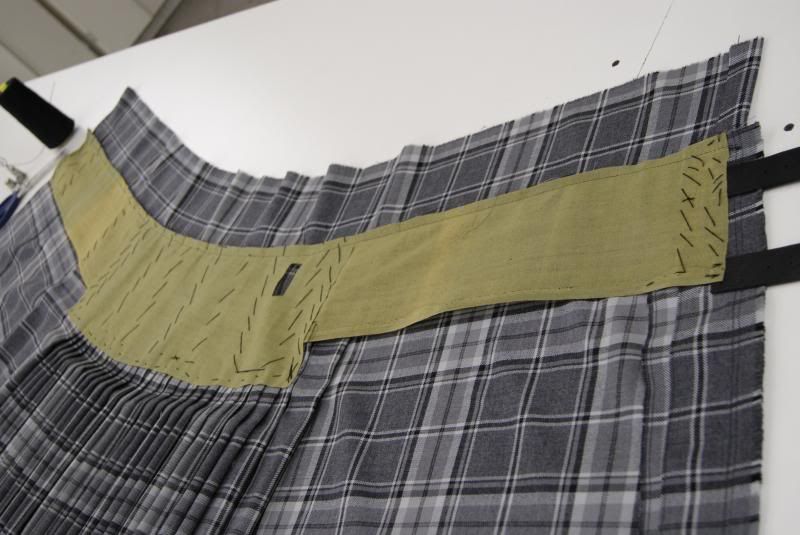
Next we put in a horsehair canvas lining. We sew it into the kilt in 3 pieces... a wider piece across the inside of the pleats (which are now scalloped out) to reinforce the structural integrity of the pleated section and two narrower pieces on each apron. These will provide rigidity of the upper portion of the kilt across the belly and help take the pressure of your body pushing out against the kilt. It helps to minimize or eliminate the wool itself bearing this force and distorting the tartan. This step MUST be done in order to ensure the long life of the garment. Even though you don't really see this step in the finished kilt (and some companies may skip it as it adds time in hand sewing), it is important. We also partially steek the kilt a 3rd time through the horsehair canvas, to help keep the pleat tips up.
Note that the straps on the near side are stitched to the canvas and all 3 pieces are stitched together where the 2 joins are.
Next, the lining is cut out and sewn in. We start with the bottom edge of the under apron and work our way across the bottom of the fell to the front of the kilt. We then work our way up the fringed edge and back across the top.
Here is a close up picture of the hand sewing across the bottom of the lining in the pleated section. Each pleat has 3 - 4 stitches stitches on it holding the lining to the wool. This line of stitching also acts as an additional line of steeking. You'll have to look closely as the stitches are pretty small and are black thread on black lining. Ideally, they'll be effectively 'invisible' to the eye.
Here is the lining, fully sewn into the kilt

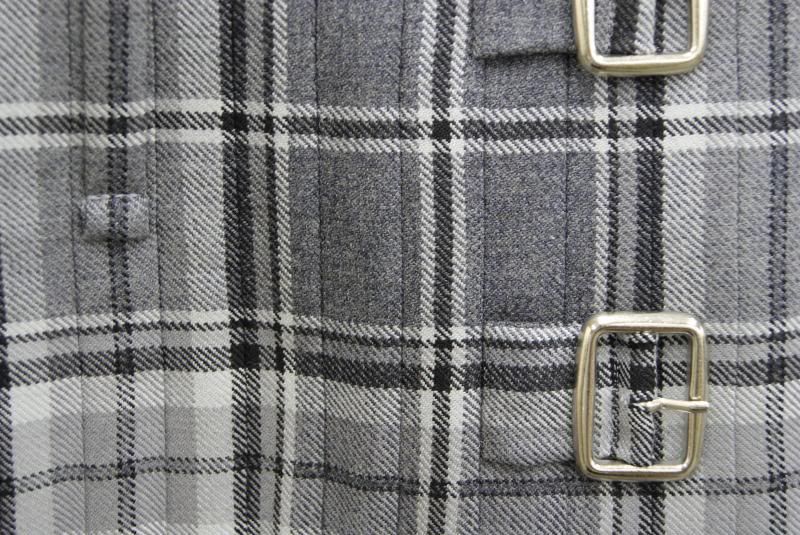
After that, we add the hole for the strap to come through the kilt and the buckles to the outside of the kilt. Here's a closeup picture of the pleats, the buckles and a belt loop after the kilt has been pressed. Notice that you don't see any stitches on the pleats from outside of the kilt.
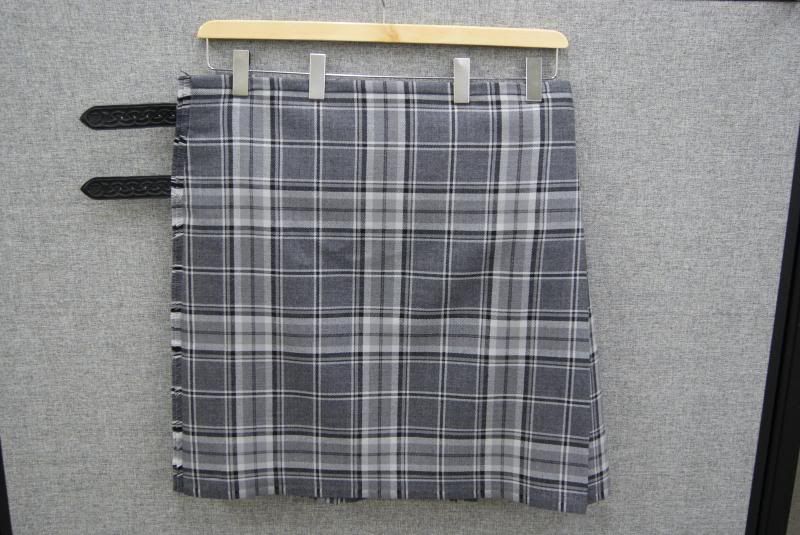
After the kilt is pressed, we're finished! Here's the kilt ready to be picked up by the customer.
And the pleats...

And now you know how our Premier 8 Yard Kilts are made. While they may look similar to our 5 Yard Wool, Semi Traditional, and Casual models there's a lot more effort and labor that goes into the construction of the Premier 8 Yard kilt that you don't see.
I hope these pictures helped to answer the question on why some kilts are more expensive than others. If you have any further questions, please feel free to post them below or email me at rocky@usakilts.com


