Monday, December 30, 2013

Custom Sporran Designs

In case anyone was wondering, we CAN have custom sporrans made to spec (within certain restraints). We don't have the ability to alter shape and come up with a brand new cantle design, but we CAN do more than just our standard sporrans! If you want to mix and match elements from sporrans we carry OR you have a specific hide in mind for a sporran (badger, muskrat, jackolope, bear, raccoon, stag, etc) OR you want your own personal FF or Police badge on a sporran, we can help!

Below are 3 different, NON stock designs. 2 were for 1 customer who supplied the pewter knot work and the pewter stag head. The other was for a customer who wanted a "non traditional dress sporran" and we helped him come up with this design.


Think outside the box!  Email Rocky@USAKilts.com with your ideas and we'll see if we can help!

Thursday, September 26, 2013

Videos now online

We took a long time to do them and an even longer time to complete them, but our videos are now on Youtube!

We took the most common questions we are asked and put the answers out there for all to view.  Now you can get even closer to an "in store" experience without ever leaving your chair.  We cover topics from "What's the difference between Sett and Stripe" to "how do I tie my ghillie brogues", to "How not to lose a kilt pin."  The videos are either educational / tutorial, product guides, or measuring instructions.

Click here for a link to our Youtube channel to view all our videos.


Here is a sampling of a few of our videos.


How to put on a kilt outfit:


Kilt Jacket Styles and when they're worn:


How to wear a sash (for women):


Wednesday, August 7, 2013

Ancient, Modern, Muted, Weathered... What's the difference?


When you look at the tartans available from the different mills in the UK, you often come across what appear to be more than one tartan for the same clan or more than one version of the same tartan.  Using the MacDonald Clan tartan as an example, you may see MacDonald Ancient, MacDonald Modern, MacDonald Muted, and MacDonald Weathered.  Does that mean there are 4 MacDonald Clan tartans?  What are the differences between them?

Strictly speaking, the MacDonald Clan tartan (as shown below) is defined by it's thread count.  By thread count, I'm referring to the sequence of colors and the # of threads of each color.  When that sequence is stacked up warp and weft (horizontally and vertically as you weave cloth), you have a tartan.  For the example of MacDonald, it's thread count is:

/Blue 18, Red 4, Blue 8, Red 10, Blue 25, Red 4, Black 25, Green 25, Red 8, Green 6, Red 4, /Green 18

Below is a picture of the MacDonald tartan, showing that thread count  The image was taken from the Scottish Tartans Authority:


The terms Ancient / Modern / Muted / Weathered (aka Reproduction) are color palettes for a tartan. The thread count does not change, but the shades of the colors within the thread count doesThis does not make it a different tartan, as only the shades of the color have changed, not the thread count itself.  To use a parallel example, take a dark red Chevy Corvette and a bright  red Chevy Corvette and put them side by side.  So long as the year, make and options are the exact same, they are BOTH identical Corvettes with the same performance, just slightly different colored versions of the same thing.  

The same holds true for tartans.  Just because the color palette varies slightly doesn't make it a whole new tartan, just a slightly different color version of the same tartan.  Below are examples of how the color palettes change for each version:

AncientThe Ancient color palette is meant to simulate older plant dyes, which would generally come out lighter in color.  In the tartan cloth, the following colors (as defined in the tartans' thread count) have the following shades:

Red turns to orange
Blue turns to a light sky blue
Green is a grassy green
Yellow is a pale yellow

Here's an example of the MacDonald Clan tartan in the ANCIENT color palette:


ModernThe Modern color palette is meant to emulate modern, bold colored dyes.  These are darker in color and more bold.

Red is a bold red
Blue is a navy blue
Green is a dark bottle gree(like a beer bottle)
Yellow is a bold yellow

Here's an example of the MacDonald Clan tartan in the MODERN color palette:


MutedThe muted color palette is meant to emulate soft, natural colors.  It falls between the lighter ancient color palette and the darker modern color palette.

Red turns to blood red
Blue is a stormy sky blue
Green is an olive green
Yellow turns to a gold

Here is an example of the MacDonald Clan tartan in the MUTED color palette:


Weathered (aka reproduction) - The Weathered color palette (also known as "Reproduction" by one mill) is meant to look like the tartan has been recovered from a bog and affected by the weather.  It uses lots of browns and grays to drive that look home.

Red turns to a "salmon" red
Blue turns to bluish grey
Green becomes brown
Yellow turns to pale gold
Here is an example of the MacDonald Clan tartan in the WEATHERED color palette:


If there's one thing to take away from this article, it's that a tartans thread count (how a tartan is 'defined') doesn't change going from Modern to Ancient to Muted... just the colors within the tartan itself turn different shades of the defined color.

What is your favorite color palette for your clan tartan?  CLICK HERE to view the stock tartans offered from all of the Scottish mills and see for yourself the differences between Ancient, Modern, Muted and Weathered for your own tartan.

Saturday, July 20, 2013

How NOT to make a kilt...

A bit of history... Those of you who know me and have heard my 'pitch' may have heard me answer the question (which is asked a LOT), "Which is better... a Hand Sewn kilt or a Machine Sewn kilt?"  My answer is ALWAYS, "it depends on the skills of the kiltmaker... I've seen high quality hand sewn kilts and POOR quality hand sewn kilt just like I've seen high quality machine sewn kilts and POOR quality machine sewn kilts".

A while back I repaired (for a pipe band we service) a machine sewn kilt from one of our competitors.  It was a poorly made machine sewn kilt as much of the internal bits of the kilt were missing.

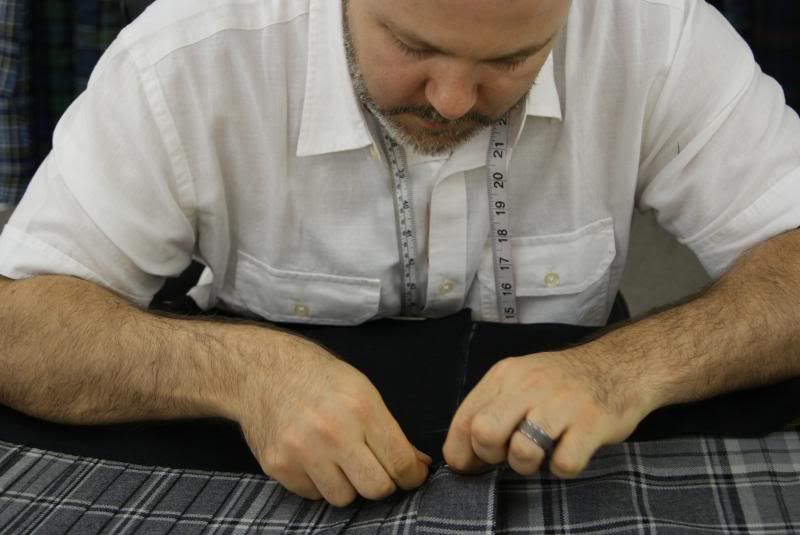
Today, a pipe band who uses us for a few items called about bringing in a couple kilts to be repaired and altered.  Normally we do not repair other kilt maker's work because we don't know what we'll find (you'll understand why by the end of this post), but since these 2 individuals are existing customers and have purchased multiple kilts from us, we wanted to help them out.  Below is an example of a poor quality hand sewn kilt, as brought in by a local band who went with a reasonably inexpensive, local, part time kilt maker (in MD).  She isn't new to the trade... her website states that she's been making kilts for 38 years.

I am specifically NOT naming the company used to make this kilt (b/c I don't want to embarrass them in public), but if you'd like to see the signature on the inside of the kilt to verify who I am speaking about, I can email you a picture.

I've often spoken about the quality of thread being an issue when sewing a kilt.  I can now show you why.  When you use poor quality and reasonably thin cotton thread, it will deteriorate over time.  The kilts I repaired today were made in 2008 and 2010.  The wool fabric itself was still in FANTASTIC shape (which tells me the kilts weren't abused or excessively dry cleaned to cause premature deterioration of the thread).  Here is some of the thread that was pulled from the kilt where the thread had snapped.  Notice how fuzzy the thread is and how there are thin spots visible where it would have failed again:


I did do a burn test on this thread.  When burned, the smoke was not black, it ashed up and kept burning until I blew it out.  It left ashes and not a hard plastic ball.  It smelled like smoke and not burning hair, so I determined it to likely be cotton.

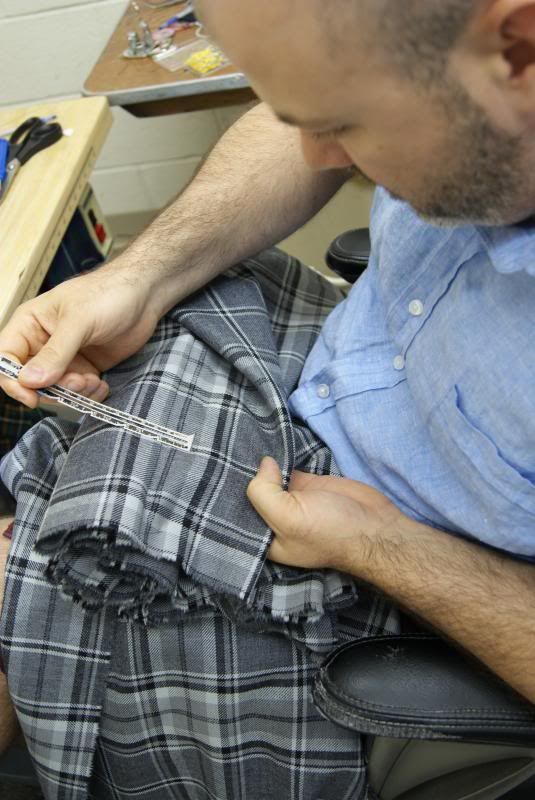
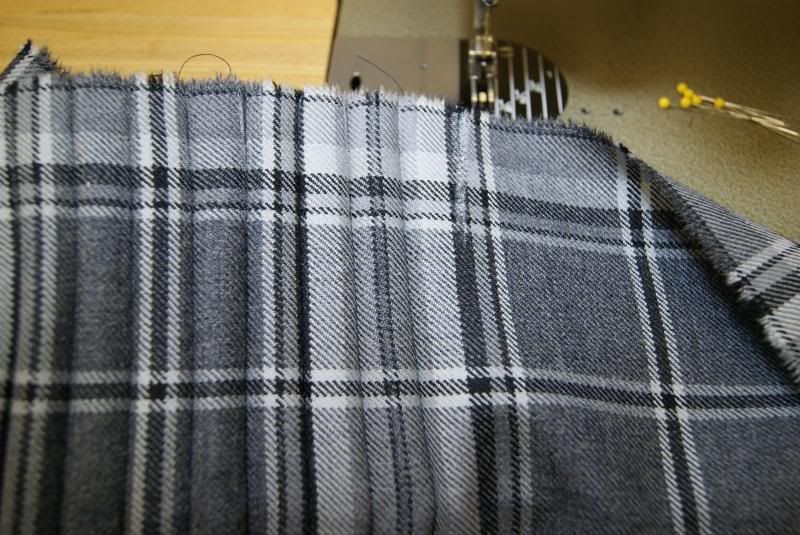
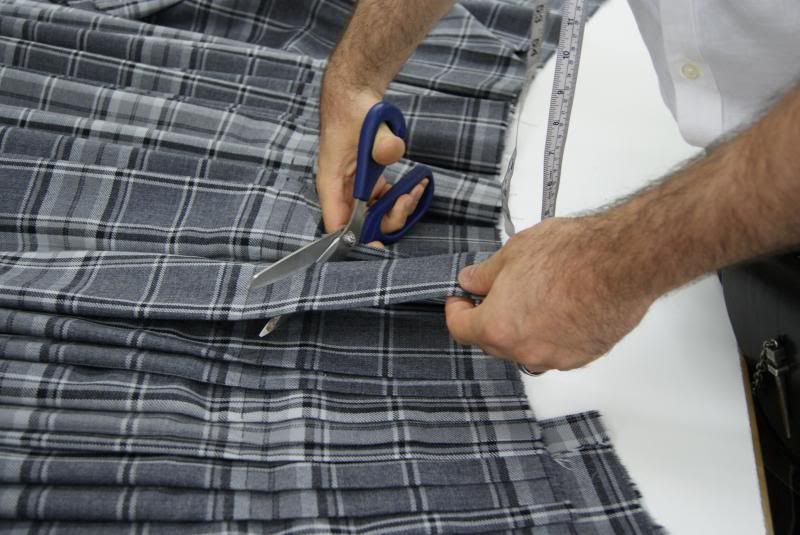
Another issue with this particular kilt (which will be compounded by brittle disintegrating thread) is the stitches per inch.  A good hand sewn kilt will have 8 to 10 stitches per inch.  More stitches per inch = more time it takes to sew.  That's the beauty of a machine sewn kilt... you set the stitches per inch by a dial on the machine and it doesn't take any longer or shorter.  On a hand sewn kilt, each stitch takes time, and time = money.

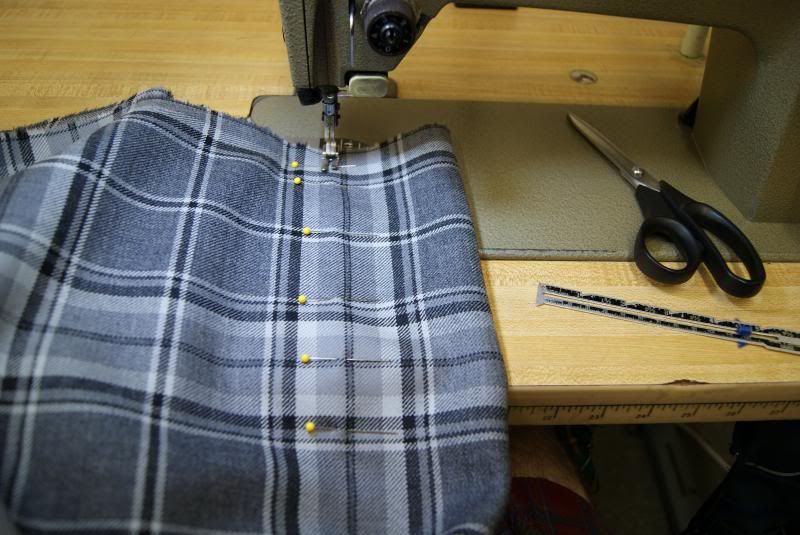
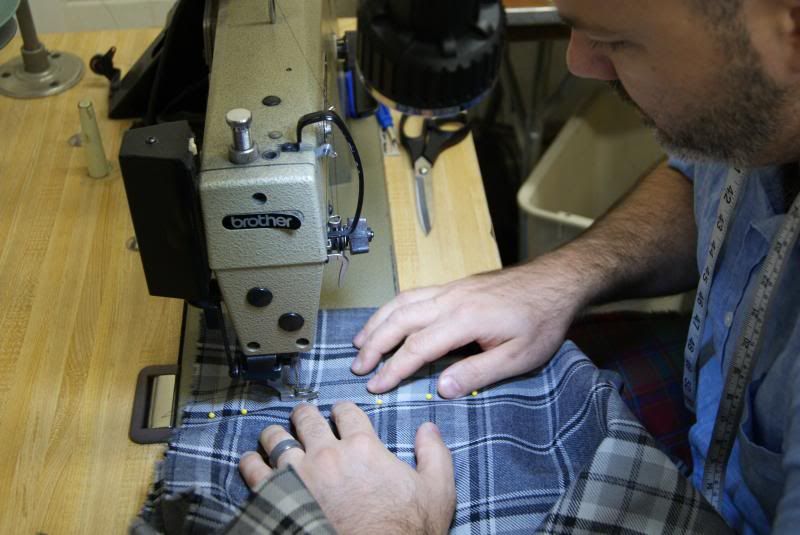
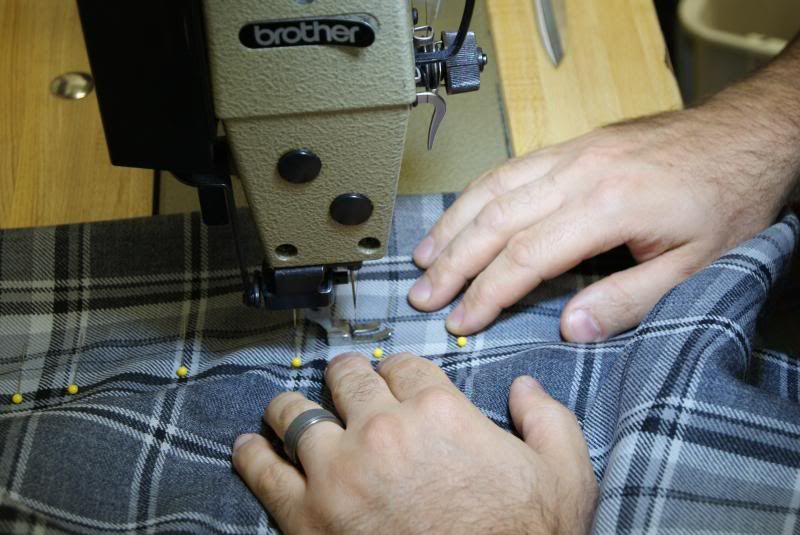
This particular kilt has 5 stitches per inch (and I sampled the kilt across 10 pleats with my ruler to get a fair average # of stitches per inch).  I used pins to show the location of each stitch, to make it easier to see:


The issue with fewer stitches per inch is that there is more stress ("load") born by each stitch when the body pushes out against the fabric.  This is especially true when the canvas lining isn't sewn in (see next section).  When you couple the additional stress of fewer stitches with the poor quality thread, you get breaks in the thread.  This kilt also doesn't appear to have any "lock stitches", meaning that if a thread fails (breaks), it will pull out to a locked stitch and 
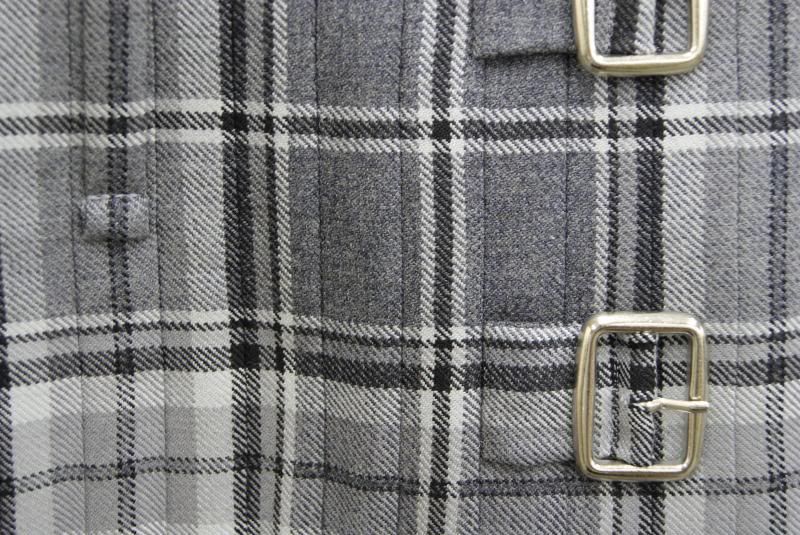
stop.  Here are two pleats that have torn out due to failed stitches:


 Here is a stitch that just failed and is starting to come apart:


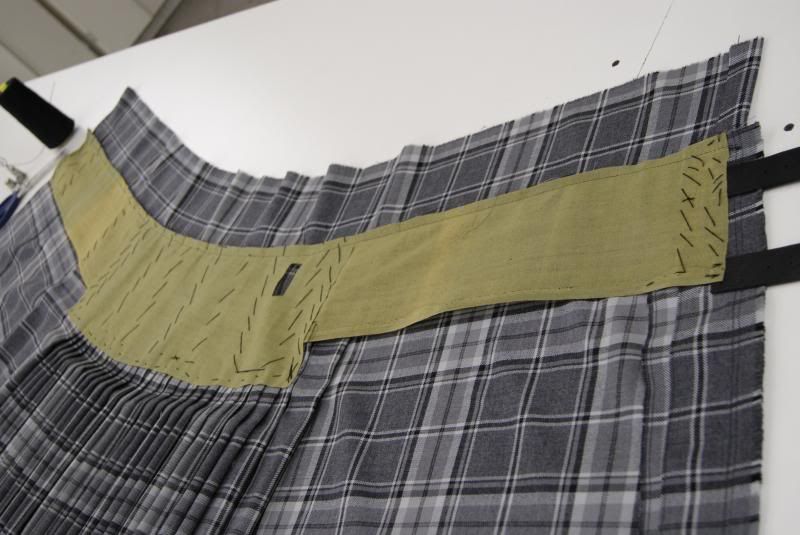
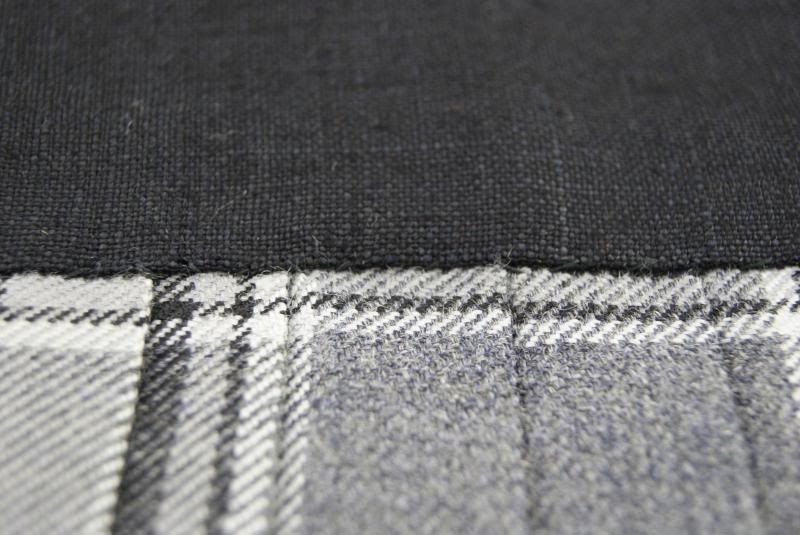
On top of the thread issue, this kilt also has fusible lining ironed in, instead of horsehair canvas lining sewn in.  Fusible lining is used by some large machine sewn kiltmaking companies in Scotland to save time (mass production), but I have NEVER seen it in a hand sewn kilt before.  It saves roughly 30 to 40 minutes of labor in the makeup, but over time, the fusing glue comes loose and presto, the internal lining is just 'floating' under the cotton lining, serving no purpose.  This puts ALL the stress on the pleat stitches, and when there are only 5 stitches per inch, you get failed stitches (breaks).


You'll also notice in the picture above that the scalloped pleats are not all sewn together (steeked).  Well, funny thing... they were steeked, but the thread snapped, leaving 3/4 of them dangling without any reinforcement from steeking stitches or the reinforcement of a horsehair canvas (since the fusible interfacing had come unglued).  This contributes to pleat splay and having the depth of each pleat stick down below the bottom of the selvedge.

The stitches holding the bottom of the cotton lining to the wool also failed (again, cheap thread):


The black bar in the above photo covers up the kiltmaker's signature and date (she signs and dates each kilt she makes).

I wanted to hold this kilt up as an example that no matter hand sewn VS. machine sewn, no matter 1 year making kilts VS. 38 years, there are good and bad quality kilts out there.  A quality kilt is made up of a combination of ALL of the following:

1.  Quality material
2.  Quality thread and internal components
3.  Skill of the kilt maker

I hope this helps to explain more of what to look for in a kilt and helps to educate a bit about the construction of a proper kilt.

Tuesday, June 11, 2013

Care for Summer Fashion That Beats the Heat

Four Things to Remember When Caring for Your Kilt

Any respectable kilt maker will explain to a potential customer why it’s important to purchase the best quality kilt that they can afford. This is because a nicer quality kilt has more versatility and can be worn in different situations. To draw a parallel, envision a nice pair of slacks. You could easily get away with pairing them with a jacket and tie and attending a dressy function. At the same time, you could also wear them on your daily errands, paired with a polo, and people wouldn't give it a second glance. However, the inverse is not true.  If you are attending a dress function with a pair of informal cargo shorts or jeans, you’re probably not going to get a favorable reaction.

The same holds true with a quality kilt. You’ll get more use out of your kilt and turn heads for the right reasons. However, in order to justify an investment like an 8 Yard kilt, you’ll need to learn how to properly care for it. With the right maintenance and storage practices, there’s no reason why you can’t enjoy your fine wool kilt for the rest of your life. The question then begs: What are some things to keep in mind to protect your investment, so you can get the most mileage out of your kilt and hand it down to the next generation? Here are some tips to keep in mind:

                                  Dry-Clean Your Kilt Only Occasionally and as a Last Resort: The solvents dry-cleaners use aren't the best for a wool kilt. That’s because they remove the wool of its natural oils, making it more brittle over a period of time. In addition, if they're not familiar with kilts, a poor pressing could result in the kilt’s pleats looking disheveled. While the kilt should be pressed every couple of years, it should only be done carefully by hand or by a trained kilt maker. Talk to your dry-cleaner, and if they haven’t dealt with kilts before, it might be best to seek other methods.
                                  You Can Wash Your Kilt But Proceed with Caution: Most of the time, you don’t need to completely soak your kilt, but if you feel it’s necessary, make sure to soak it in cold to lukewarm water – and only for a few minutes at that. Again, though, this is usually unnecessary unless it’s really dirty. Dabbing a stain with a cold wet cloth and a drop of Dawn detergent is usually enough to rid your kilt of it.  If you do soak the kilt, lay it flat to dry.
                                 Remember to Only Store Your Kilt When It’s Completely Dry: Let’s say you were at your local Highland Games, and you experienced a bit of rain ("fine Scottish weather"). Before you store your kilt for the next occasion, make sure it’s completely dry by laying it flat across the foot of your bed or back of your sofa. Otherwise, mildew might befriend your kilt, and nobody wants that. If needed, aim a fan at the kilt to aid in drying.
                                  Store Your Kilt in the Closet or in a Drawer: Your kilt can be hung in a closet, but make sure you protect it with a cloth garment bag to prevent a moth attack. Moths love wool and will happily procreate, so future generations can eat holes in your wool kilt as well. Many experts recommend storing your kilt in a drawer, but make sure to lay it flat and store it with cedar blocks if possible.


This sounds easy enough, right? Good! With the right care and thoughtful maintenance, a quality kilt will be a bargain you will wear for a lifetime and be able to hand down as an heir loom. 

Wednesday, May 22, 2013

How a kilt is made / Why does a kilt cost so much?

We often get asked why a traditional kilt costs so much.  They retail for roughly $500, which is a pretty hefty sum to lay down for a single article of clothing for most guys.  While sewing a Premier 8 Yard Kilt, we documented several (not all) steps of the process to show our customers and friends what's involved in the construction costs (aside from the high price of wool cloth).  An 8 yard kilt takes roughly 18 to 20 hours of labor to complete, soup to nuts and that doesn't account for the wool cloth, the lining, the straps and buckles or the canvas.

The largest block of time is in the sewing of the pleats.  Each pleat is meticulously measured using a tiny ruler and then pinned.  When the pin comes through the back side, the adjacent pleat must be measured as well.  This is how we sew the pleats "inside out" so that you don't see any of the stitching from the outside of the kilt.


Each pleat is pinned 6 to 10 times down the length of the fell (the sewn down area in the upper portion of the kilt).  Measuring and pinning and sewing each pleat takes roughly 8 - 10 minutes per pleat.  To give you an idea how long that will take, this kilt has 28 pleats, which means we'll spend about 4 hours (and up to 5 hours if we have to re-do any pleats) sewing the pleats alone.


Then each pleat is sewn, slowly and in keeping with the curve of the person's body (waist to hip ratio), with reinforcement at the bottom of the fell.


After the pleat is sewn, the pins are removed and the pleat is checked for accuracy and consistency.  The horizontal lines of the tartan must be perfectly lined up with no "stair effects" (where one line is higher than the same line on the adjacent pleat).  The pinning helps to minimize this, but occasionally we get the "stair effect" for a particular pleat if the fabric twisted while pinning or sewing.  At USA Kilts, our tolerance is 1 thread off.  If the "stair effect" is 2 threads or more, the pleat must be taken out and re-measured / re-pinned / and re-sewn.


After the pleats are all sewn in and the front and rear aprons are attached, the pleats are pressed flat down the length of the fell and scalloped out.  This reduces the bulk in the waistband and makes the kilt more comfortable.  It also compromises the structural integrity of the kilt, so the pleats must be steeked across the bottom of the fell to keep them from dipping down below the bottom of the kilt where they aren't supported in the waistband.


The pleats are steeked (we steek them with a machine to themselves and then we also steek them by hand to each other) to reinforce the structural integrity of the garment.   From this point on, pretty much all the sewing is done by hand.  It is much more time consuming than using a machine, but must be done by hand to keep the stitches from showing through to the outside of the garment.


Next we put in a horsehair canvas lining.  We sew it into the kilt in 3 pieces... a wider piece across the inside of the pleats (which are now scalloped out) to reinforce the structural integrity of the pleated section and two narrower pieces on each apron.  These will provide rigidity of the upper portion of the kilt across the belly and help take the pressure of your body pushing out against the kilt.  It helps to minimize or eliminate the wool itself bearing this force and distorting the tartan.  This step MUST be done in order to ensure the long life of the garment.  Even though you don't really see this step in the finished kilt (and some companies may skip it as it adds time in hand sewing), it is important.  We also partially steek the kilt a 3rd time through the horsehair canvas, to help keep the pleat tips up.  

Note that the straps on the near side are stitched to the canvas and all 3 pieces are stitched together where the 2 joins are.  


Next, the lining is cut out and sewn in.  We start with the bottom edge of the under apron and work our way across the bottom of the fell to the front of the kilt.  We then work our way up the fringed edge and back across the top.


Here is a close up picture of the hand sewing across the bottom of the lining in the pleated section.  Each pleat has 3 - 4 stitches stitches on it holding the lining to the wool.  This line of stitching also acts as an additional line of steeking.  You'll have to look closely as the stitches are pretty small and are black thread on black lining.  Ideally, they'll be effectively 'invisible' to the eye.


Here is the lining, fully sewn into the kilt


After that, we add the hole for the strap to come through the kilt and the buckles to the outside of the kilt.  Here's a closeup picture of the pleats, the buckles and a belt loop after the kilt has been pressed.  Notice that you don't see any stitches on the pleats from outside of the kilt.


After the kilt is pressed, we're finished!  Here's the kilt ready to be picked up by the customer.


And the pleats...


And now you know how our Premier 8 Yard Kilts are made.  While they may look similar to our 5 Yard WoolSemi Traditional, and Casual models there's a lot more effort and labor that goes into the construction  of the Premier 8 Yard kilt that you don't see.

I hope these pictures helped to answer the question on why some kilts are more expensive than others.  If you have any further questions, please feel free to post them below or email me at rocky@usakilts.com


Wednesday, May 15, 2013

Store Update Complete.

After a few long sawdust filled days, we were able to successfully finish our store update.  Here are a few pictures of the new cherry wood finish fixtures / slatwall / etc.

Front Counters with Sgian DubhsCuff Links, and Jewelry

Pewterware, Glassware and Scarves


Kilt Rental Outfit, TiesSporrans, etc.


We hope you find yourself in the area with a bit of time to stop in and browse around and chat.


Friday, May 3, 2013

USA Kilts Meme

Hope everyone has a great weekend.  We had a little fun here at the shop today monkeying around on photoshop:


Anyone else have a favorite Meme?

Monday, April 15, 2013

New Package Deals

For years, customers who have come into our store have been getting more options for their kilt packages than those customers on our website.  In the interest of fairness, we wanted ALL of our customers (whether online or in store) to have lots of different options when it came to package deals...

Do you want the Casual Pub Package, but want to upgrade the kilt to a Semi Trad or 5 Yard wool?  Do you want a Tweed jacket and vest with your Argyll Package instead of the normal black Argyll jacket?  Did you want a different buckle from the 4 offered?

Now you have more choices!  We've launched our new package deals on our website to be able to accommodate people's most popular requests.  We've also expanded the options given for each of the packages, so you'll have choices of 15 - 20 buckles instead of 4, 15 - 20 sporrans instead of 6, etc.

Click here to go to a list of all the new package deals on our website.

The packages can also be broken down by which KILT you want by putting your mouse over the "Kilts and Packages" option in our menu bar, then clicking on the style of kilt down the right hand side.

Here are some of the package deal pics:

5 Yard Wool Argyll Package

Tweed Premier Package


Tuesday, April 9, 2013

Updating the store

With the weather turning nice and foot traffic in the store picking up, we decided to look at different ways to improve our storefront.  We took a field trip to several upscale menswear stores and with a critical eye, tried to assess what they did well in merchandising their spaces.  The one thing that stood out was the stores that used wood fixtures really had a classy / traditional 'feel' to them.

Keeping that in mind, we've begun a store makeover.  The first step was to invest in new counter displays, freestanding fixtures, etc.  Next we'll focus on replacing our slatwall with the same color wood slatwall to improve the feel of our shop.  

Below are a few pictures of the fixtures we pieced together this past Sunday.  Do you think we've hit the mark or have we missed it with our new Cherry display cases?


Tuesday, April 2, 2013

New Ghillie Brogues

While we've been happy with our Endrick model ghillie brogues, we've always wanted 2 things which weren't available...

1.  Brown Ghillies - We weren't able to find a source for quality brown ghillie brogues.  They look very smart with daywear and tweeds, especially when paired with a brown sporran and / or brown belt.  

2.  WIDE sizes for our ghillie brogues.  We often have customers with wide feet asking us "do you carry wide sizes in your Endrick model ghillies" and we've always had to tell them no and suggest moving up a half size.  

Well, after years of looking, we found a source (in Scotland) for both! We are now carrying brown ghillie brogues as well as WIDE sizes in our Black Ghillie Brogues (Glenfinnan model ONLY).  


Are there any other products you'd like to see us start carrying that aren't on our website right now?